Flight Shapes Explained
Flight shape changes how darts stabilize after release. This guide explains practical differences and how to test shapes without changing your whole setup at once.
- Shape affects stability path Flight shape changes drag and post-release stability.
- Standard is often the first baseline Standard flights are the safest baseline for first comparisons.
- Flight choice depends on full setup Read flight behavior with shaft length, barrel shape, and release style.
- Testing routine matters more than hype Structured testing beats random swaps and hype purchases.
⚡ At a glance
- Test one variable at a time Use one repeatable routine so your decisions come from session data.
- Keep barrel and shaft constant first Practical reference point to keep decisions clear and repeatable.
- Use grouping quality as primary metric Practical reference point to keep decisions clear and repeatable.
- Choose repeatability over novelty Practical reference point to keep decisions clear and repeatable.
📊 Common shapes and typical feel
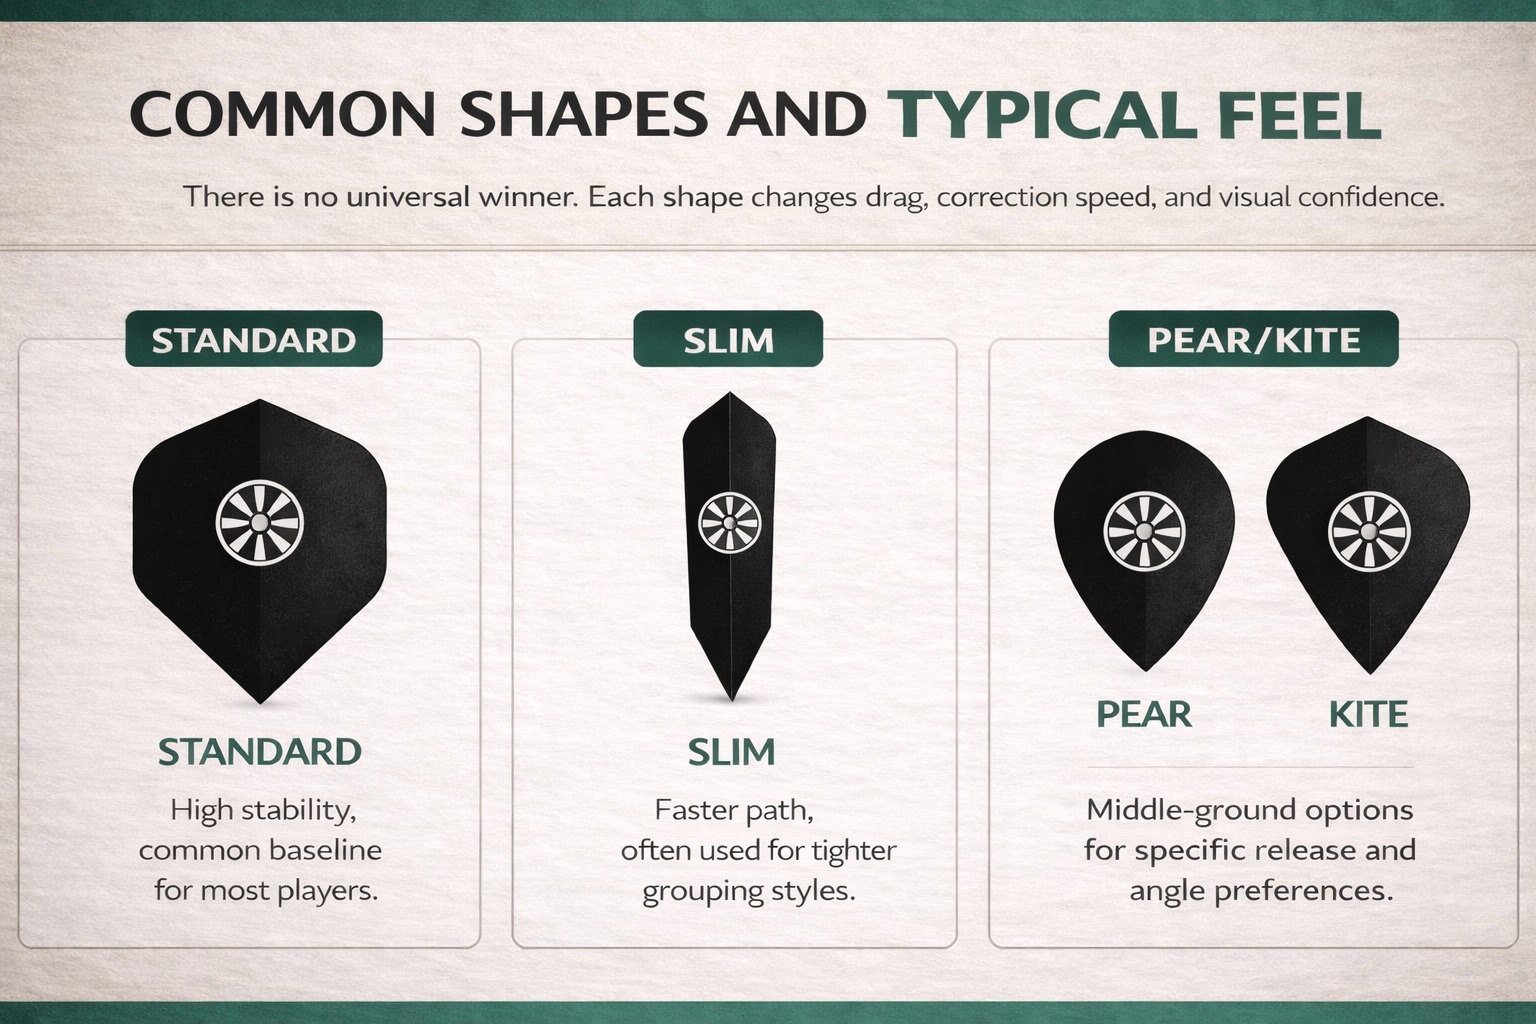
There is no universal winner. Each shape changes drag, correction speed, and visual confidence.
- Standard: high stability, common baseline for most players.
- Slim: faster path, often used for tighter grouping styles.
- Pear/Kite: middle-ground options for specific release and angle preferences.
📘 Core explanation
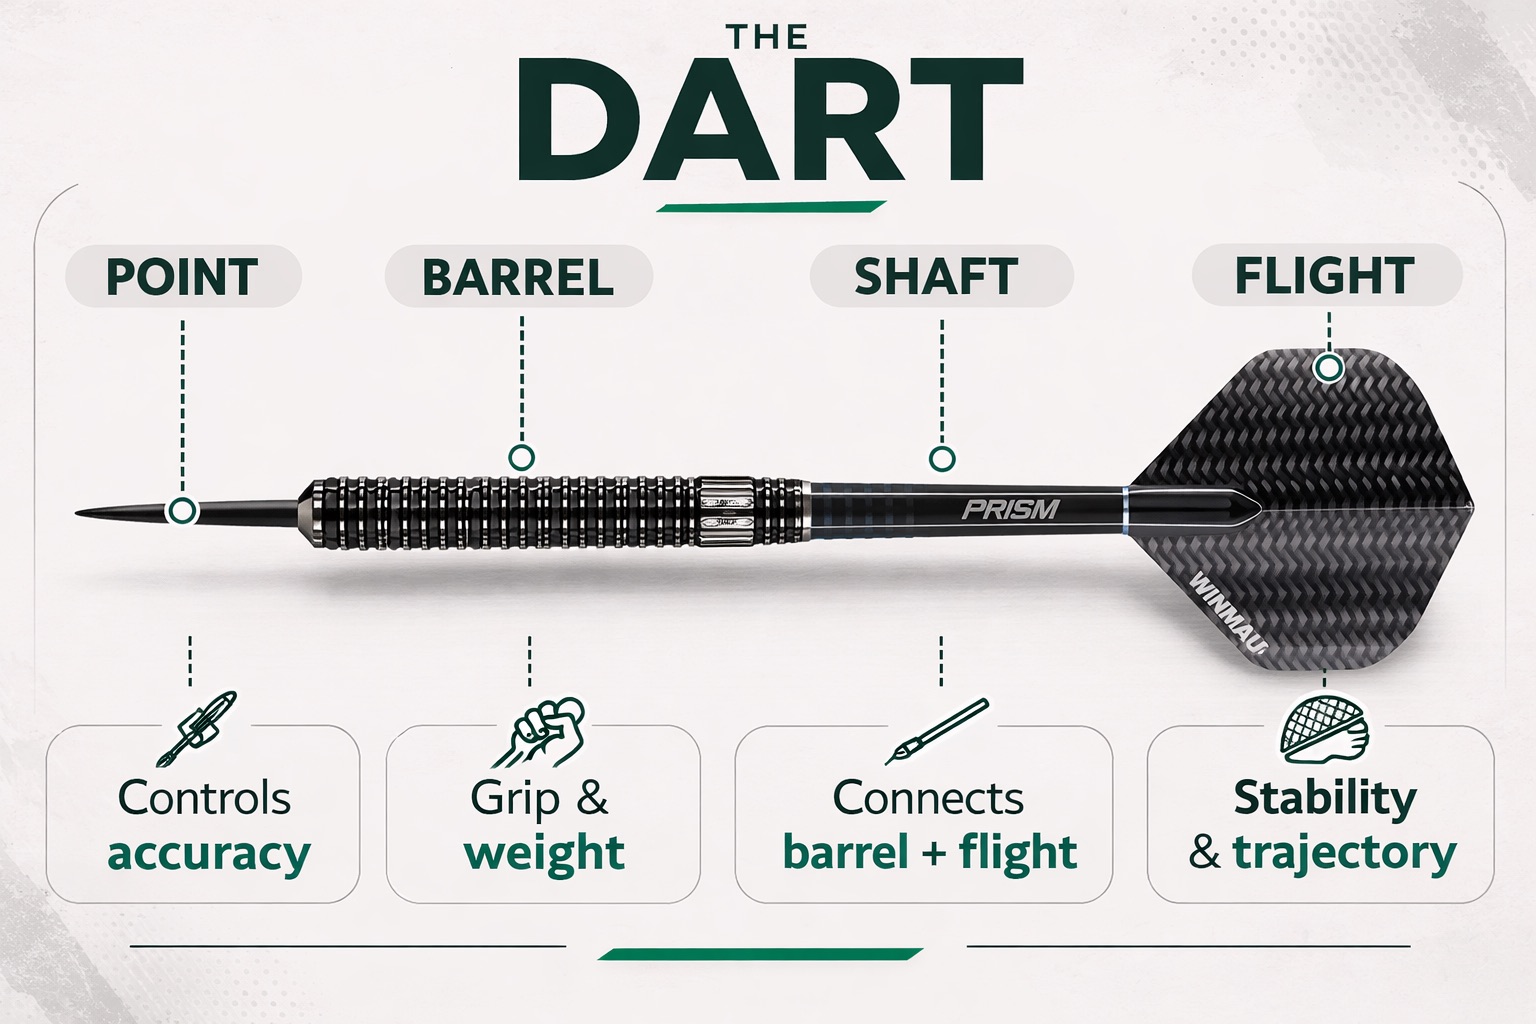
What flights actually do
Flights stabilize dart attitude during the first part of the throw path. Their effect appears in entry angle, grouping consistency, and how forgiving a slight release error feels.
Why setup systems matter
A flight should be read with shaft length, barrel profile, and grip style. One part rarely solves consistency if the rest of the setup fights your natural release.
How to run a useful flight test
Use one board target set, fixed throw routine, and equal dart counts for each shape. Record not just best groups but average quality over full sets.
🎯 Real player context: setups are systems
Verified Flight-Shape Snapshot
These anchors are mapped from official manufacturer references so you can compare one flight shape at a time with real player contexts.
How to read this block: treat each player as one shape anchor, keep barrel and shaft stable, then compare grouping quality over full sessions.
Dataset metrics
Shape coverage
4 players across 4 shape families
Standard, slim-profile, pear, and kite references are each represented once.
Source type
Official manufacturer pages
References are drawn from Target Darts product/spec pages and Target flight-shape editorial guidance.
Last source check
March 2026
Re-check periodically because pro setups and flight preferences can change.
Player setup anchors
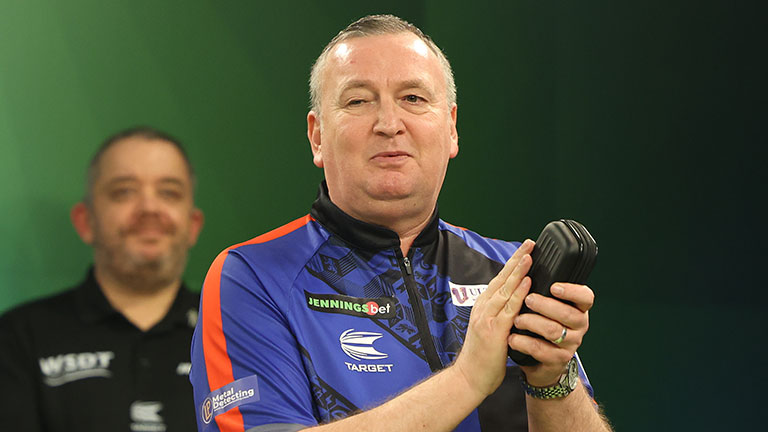
Standard shape anchor

Rob Cross
Target · 22g · Steel tip
Rob Cross is used here as a standard-shape anchor via Target references that list his flight profile in mainstream No.6-style setup context.
Slim-profile anchor

Phil Taylor
Target · 26g · Steel tip
Phil Taylor is used as the slim-profile anchor because his official 8 Flight range explicitly includes a Slim option for lower-drag testing.
Pear shape anchor
Glen Durrant
Target · 24g · Steel tip
Glen Durrant is cited by Target flight-shape guidance as a pear-shape reference player.
Kite shape anchor
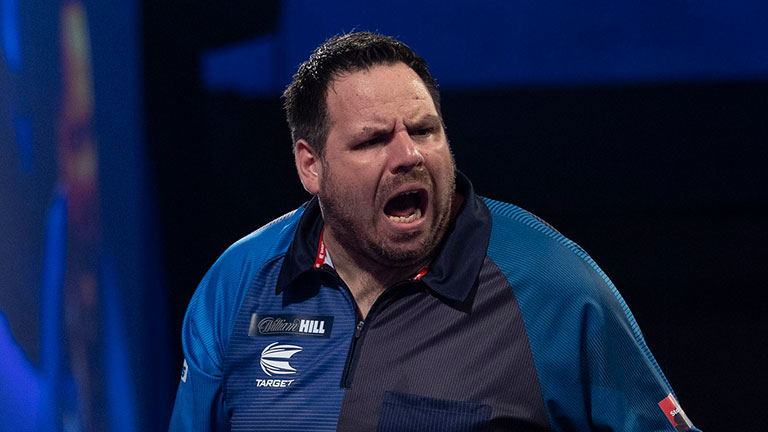
Adrian Lewis
Target · 22g · Steel tip
Adrian Lewis is cited by Target flight-shape guidance as a kite-shape reference player.
Use these examples as test anchors, not copy-paste rules. Real feel still depends on release, shaft length, and barrel geometry.
⚖️ Trade-offs to understand
Pros
- Better shape matching can improve grouping consistency.
- Controlled testing reduces random adjustments.
- Simple setup systems are easier to repeat.
Watch-outs
- Changing too many parts hides real results.
- Visual preference can mislead without data.
- Extreme shapes may reduce flexibility for beginners.
⚠️ Common mistakes
Mistake 1
Changing shafts and flights together.
Mistake 2
Judging by one highlight throw.
Mistake 3
Ignoring entry angle and only counting close misses.
🛠️ Practical advice
- Start with standard flights as baseline.
- Test slim only after baseline is stable.
- Use a 100-dart routine for each test shape.
- Keep notes on grouping and bounce-outs.
🛒 Build a simple flight test kit
Affiliate note: links below may earn a commission at no extra cost.
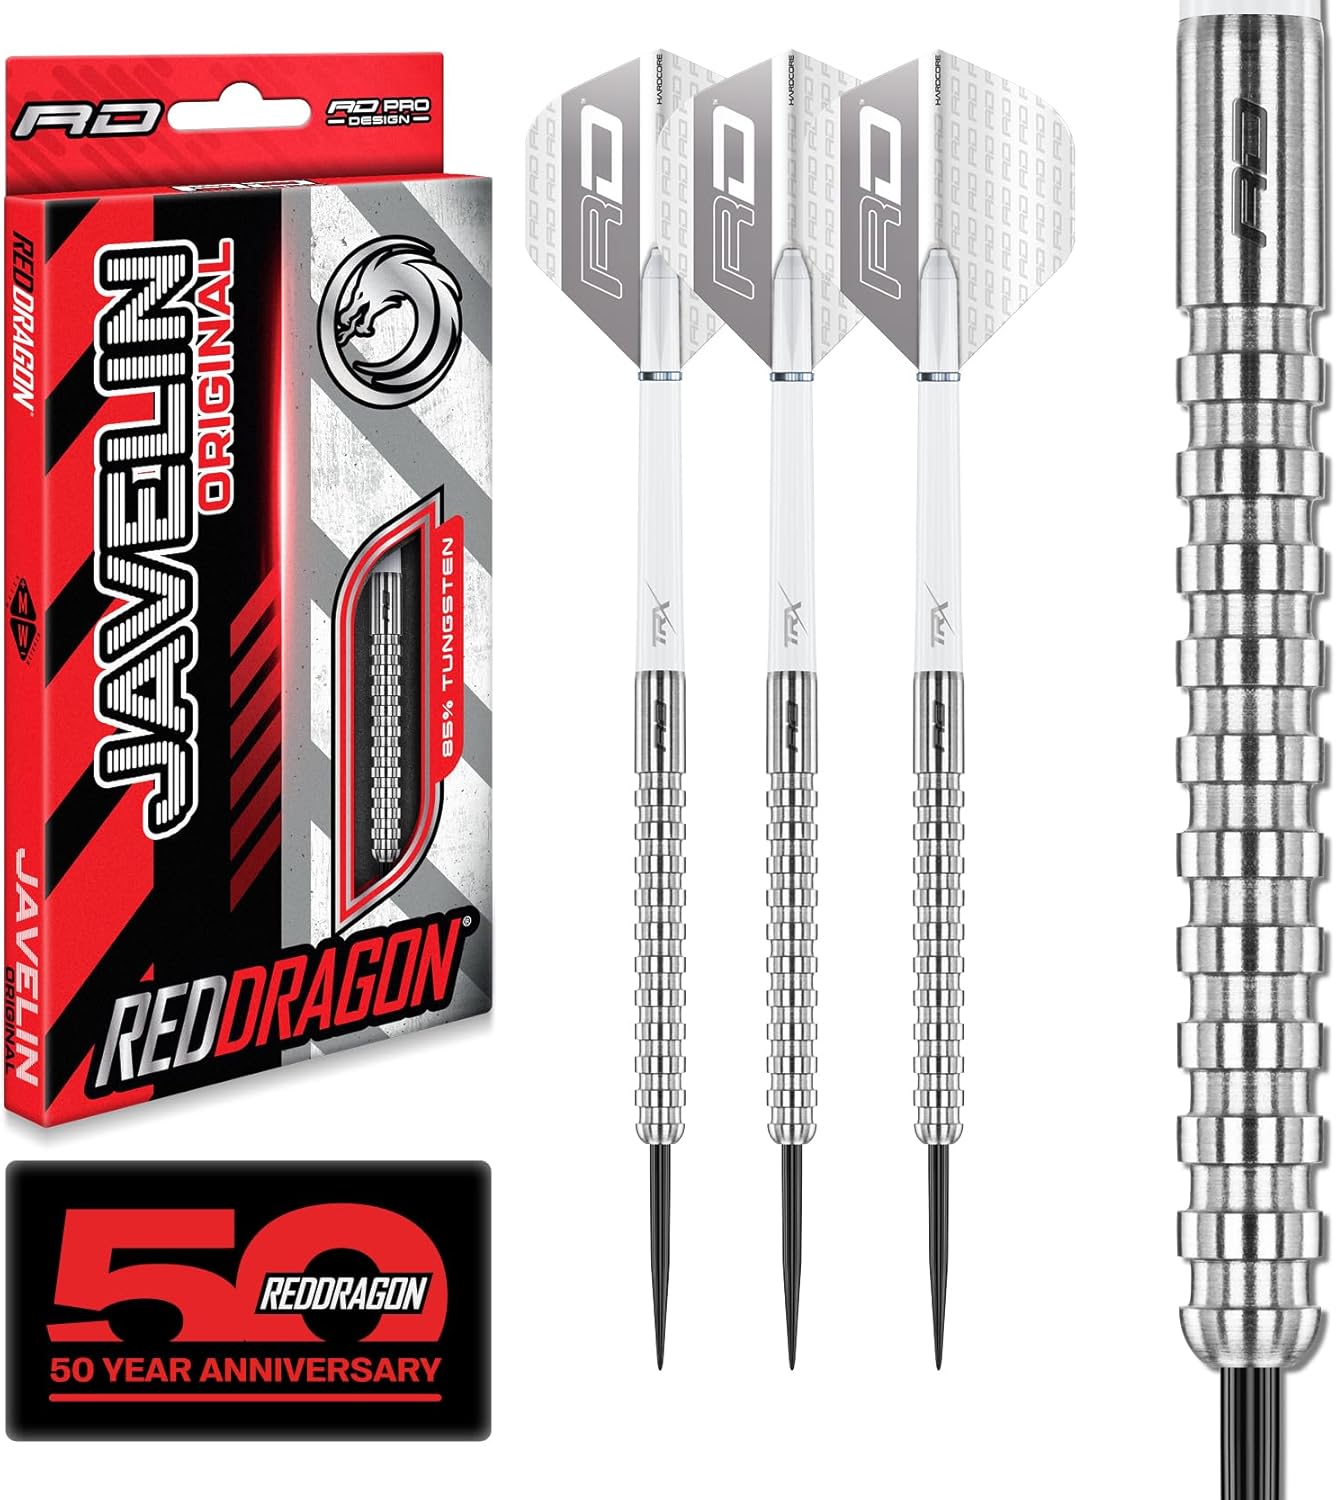
Baseline set
£18.99
Red Dragon Javelin Tungsten Checkout
Simple baseline set for testing standard flights before changing multiple variables.
View baseline set
Pro-style reference
£97.99
Target Darts Luke Littler Tungsten Swiss
Useful reference setup when comparing lower-drag flight behavior at higher pace.
View pro-style set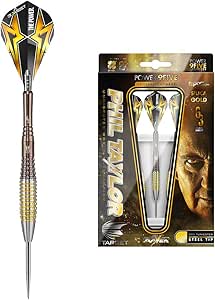
Slim-profile contrast
£104.99
Target Phil Taylor Power 9Five G3
Useful contrast anchor when you want to compare standard and slim-profile setup feel.
View slim-profile setTurn this setup into better matchplay
Use the right setup to reinforce doubles confidence, route decisions, and repeatable sessions.
❓ Flight Shapes Explained FAQ
Do flight shapes really change dart behavior?
Yes. Shape changes drag and stabilization speed, which can affect entry angle and grouping consistency.
Which flight shape is best for beginners?
Standard flights are often the easiest baseline because they offer predictable stability. After that, test alternatives with a controlled routine.
Should I use slim flights to score more 180s?
Not automatically. Slim flights can suit some styles, but grouping gains depend on the full setup and release consistency.
Can I copy a pro flight shape directly?
You can test it, but results depend on your throw mechanics. Pro setups are references, not universal rules.
How long should I test one shape?
Run multiple sessions and compare averages. One short session does not capture normal variance.
Do flights affect bounce-outs?
Indirectly. Entry angle and grouping pressure can influence deflections, so flight choice may help in combination with setup tuning.
🔎 Sources and Editorial Review
Written by
The Darts Fan editorial team
Reviewed against
WDF Playing Rules, PDC Rules of Darts, and standard matchplay conventions
Last reviewed
March 2026
How this page was built
This guide combines official references, practical home setup logic, and player-context examples to help beginners and improving players make better equipment decisions.
Editorial note
Player setups are examples for context, not one-size-fits-all recommendations.